MiaProva now provides fully customizable test ticket form – by teams!
At the earlier stage of optimization programs, MiaProva provides a standard test ticket in-take form that is based on industry best practice. Our hope is to guide users to carefully consider all factors that can impact their tests downstream.
As most of our clients reach a level of maturity and sophistication in their testing program, the need to allow flexibility has become clearly pressing. MiaProva is pleased to share that we just released a new capability, where different teams in one organization can setup different test intake forms that is most relevant to their individual needs.
Let’s walk through in some details!
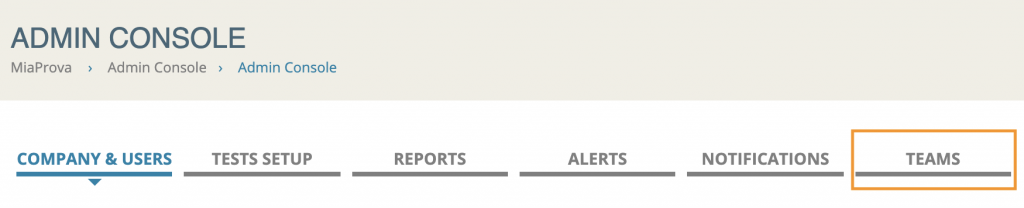
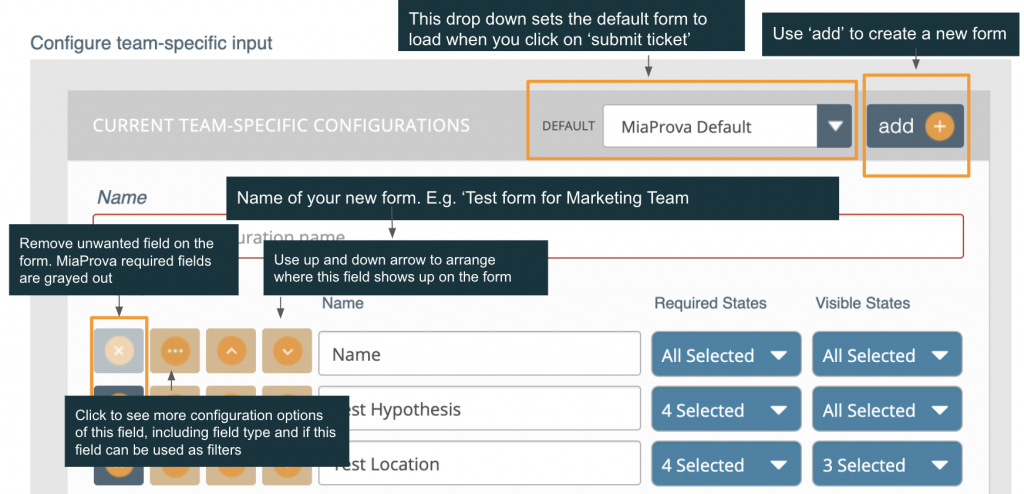
To create a new test ticket form, the test manager with admin access can go to the new TEAMS tab under admin console. Here you can setup team specific work streams, as well as customizable ticket intake form.
You can set default form for the ‘submit ticket’ page to load, as well as create and customize any team-specific new form.
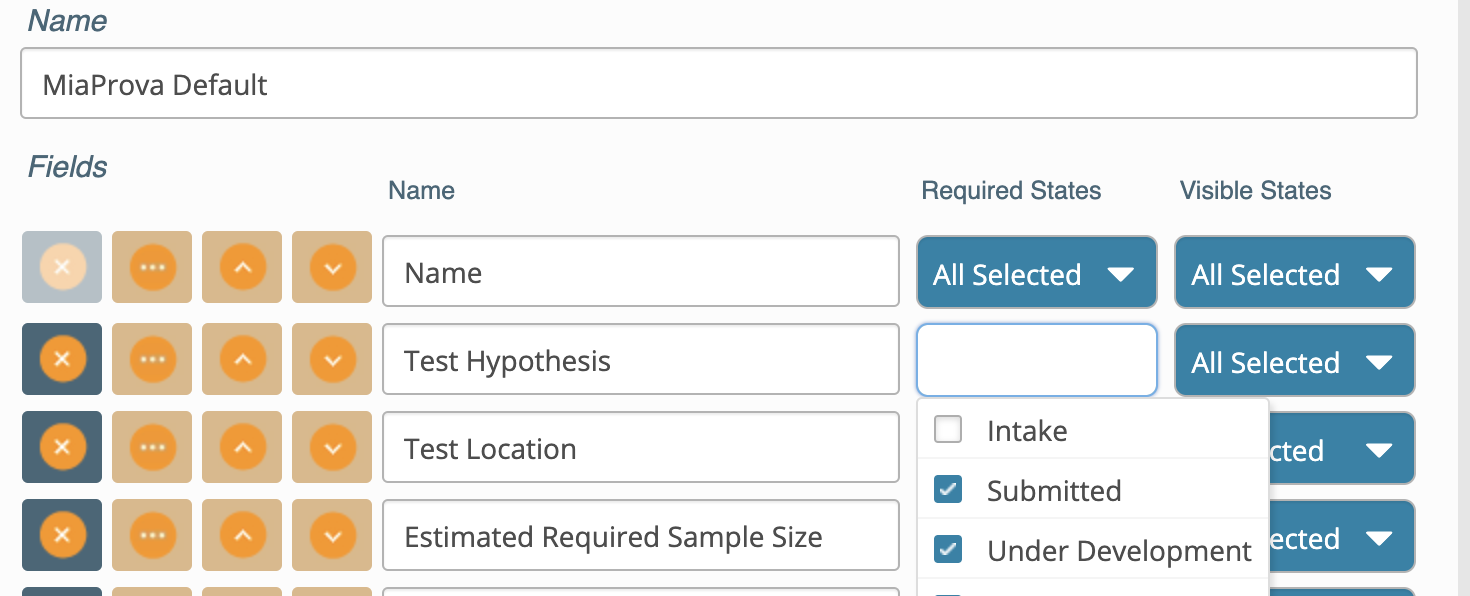
MiaProva’s ticket goes through different states in its life cycle. Here are the key states and in which order they occur:
Intake > Submitted > Under Development > Awaiting Summary > Finalized
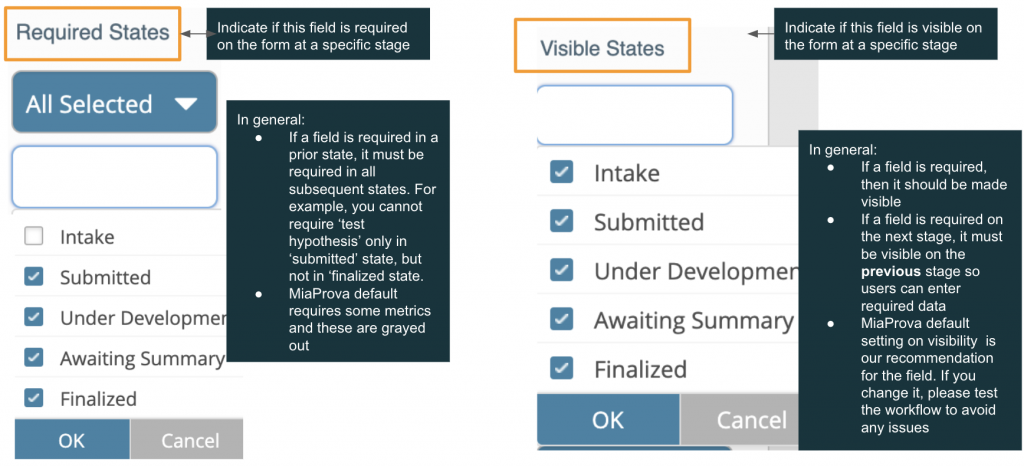
You can decide if a specific field is required on each state, or if it’s visible on a given state. Please note however since these states are sequential in nature, MiaProva would require you to enter the data in a prior state IF that field is required in the subsequent state.
In addition to add/remove fields from a default form, you can also add additional MiaProva suggested fields or customize your own fields.
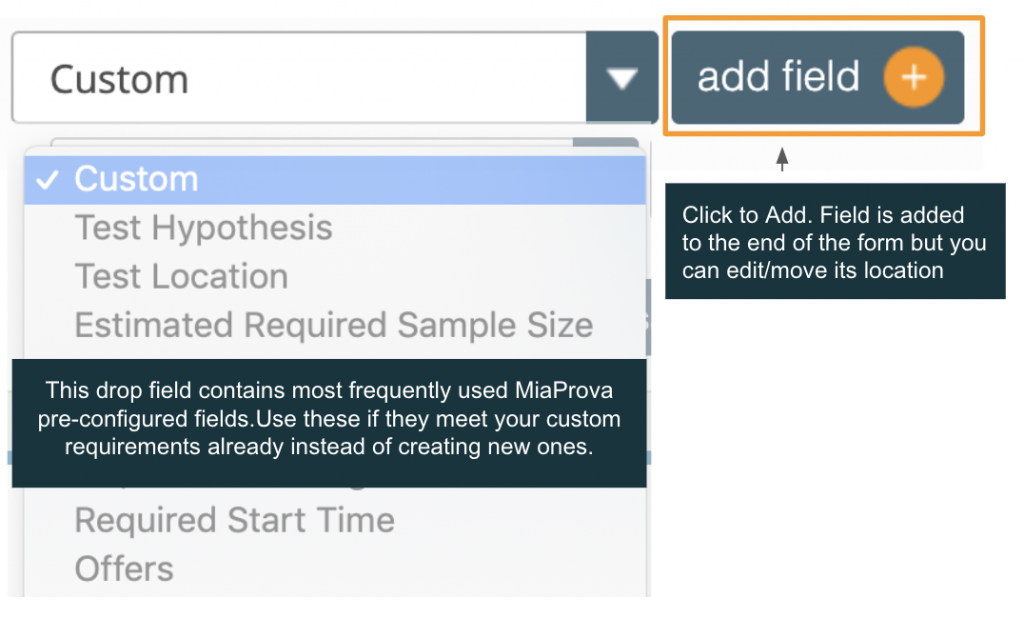
To add a MiaProva pre-configured, most frequently used field:
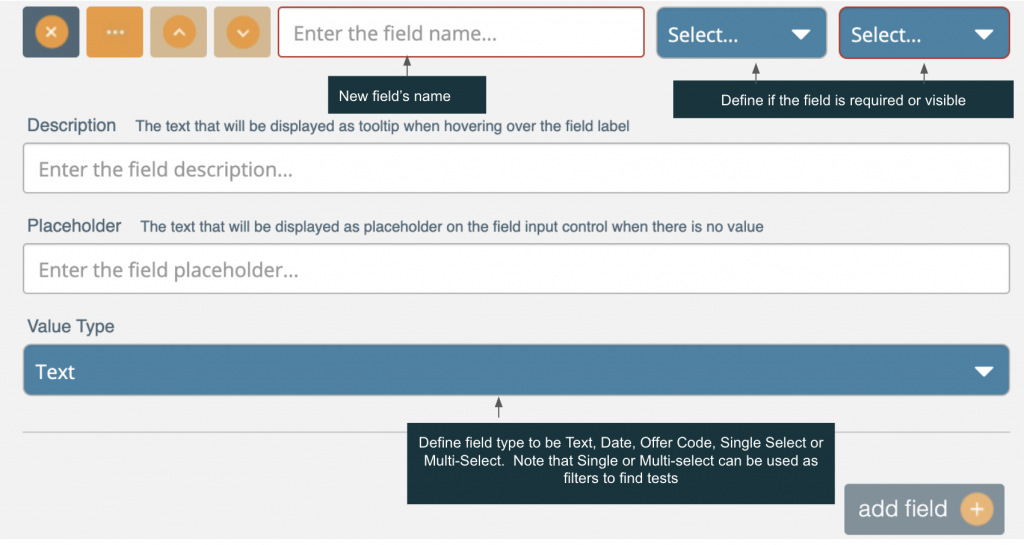
To add a new custom field, first click the ‘add field’ button, then:
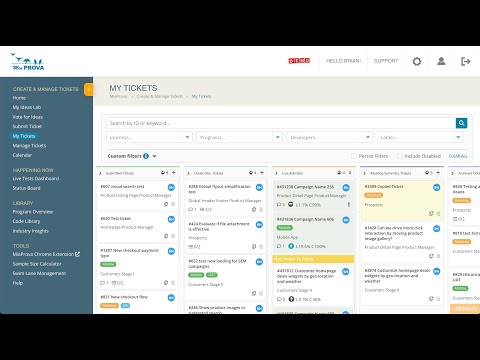
Once you finished configuring an existing form or create a new one, find it as the first item on any ticket submission form. Here is an example under the ‘submit ticket’ section:
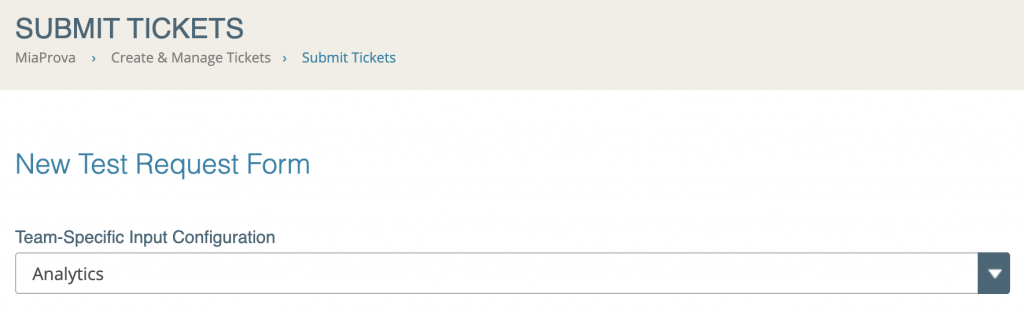
On this form, choose the form that you wish to use, and all your custom fields will show up accordingly. Note that this form will govern the remainder of the ticket life cycle! So consider carefully please when you set the ‘required’ and ‘visibility’ options when customizing the form. For instance, if you wish to have a simple form to encourage ease of submission, but want to provide very rich test information in the test summary stage, you might want to consider setting ‘test hypothesis’ as NOT required on the input form state, but add it as ‘required’ on the ‘Awaiting Summary’ and ‘Finalized’ stage.
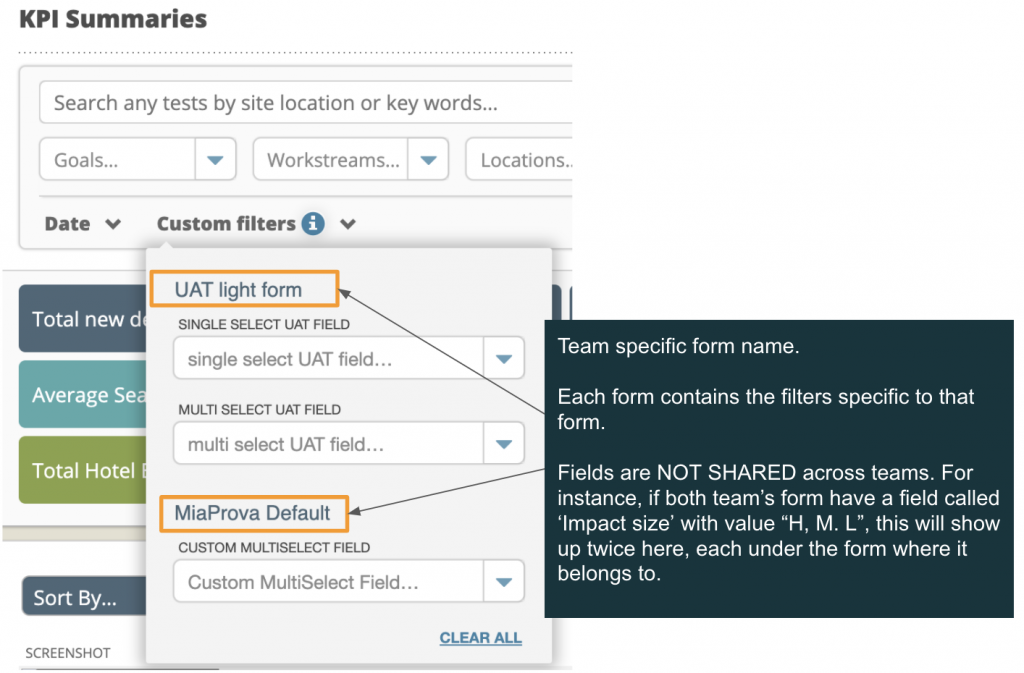
A note about filters:
Note that with these changes, we added custom filters by team as well – since filters are defined by the fields specified for an individual team. Here is an example:
A note about Jira users’ integration with MiaProva
If your organization uses Jira and has an integration with MiaProva, please note that the form that you set as ‘DEFAULT’ will be the one used to integrate with Jira. This is because Jira does not support the concept of different intake forms by different teams.